A different model for each step of a DecisionBox run

Since v0.37, a DecisionBox project can connect to more than one large language model (LLM) provider and pick a provider and model for each step of a run. You can put the cheap, high-volume work on a cheap model and keep the strongest model for the checks that decide what you see as verified. Reasoning, prompt caching and output limits follow the model each step uses.
Why one model for everything was the wrong default
A discovery run does very different kinds of work. The v0.37.0 release notes put it plainly: "Exploration is a long, cheap, high-volume loop; verification wants the most capable model available; blurb generation is throwaway."
With one model per project, every step paid the same price, whatever the step was. Saving money meant weaker verification, and that hurts trust, because validation is where a finding is accepted or rejected.
What changed
A project now holds a set of provider entries. Each one is a connection with its own credentials. Under Settings → LLM Providers you keep a default connection and can add others, for example a second provider for one small job.
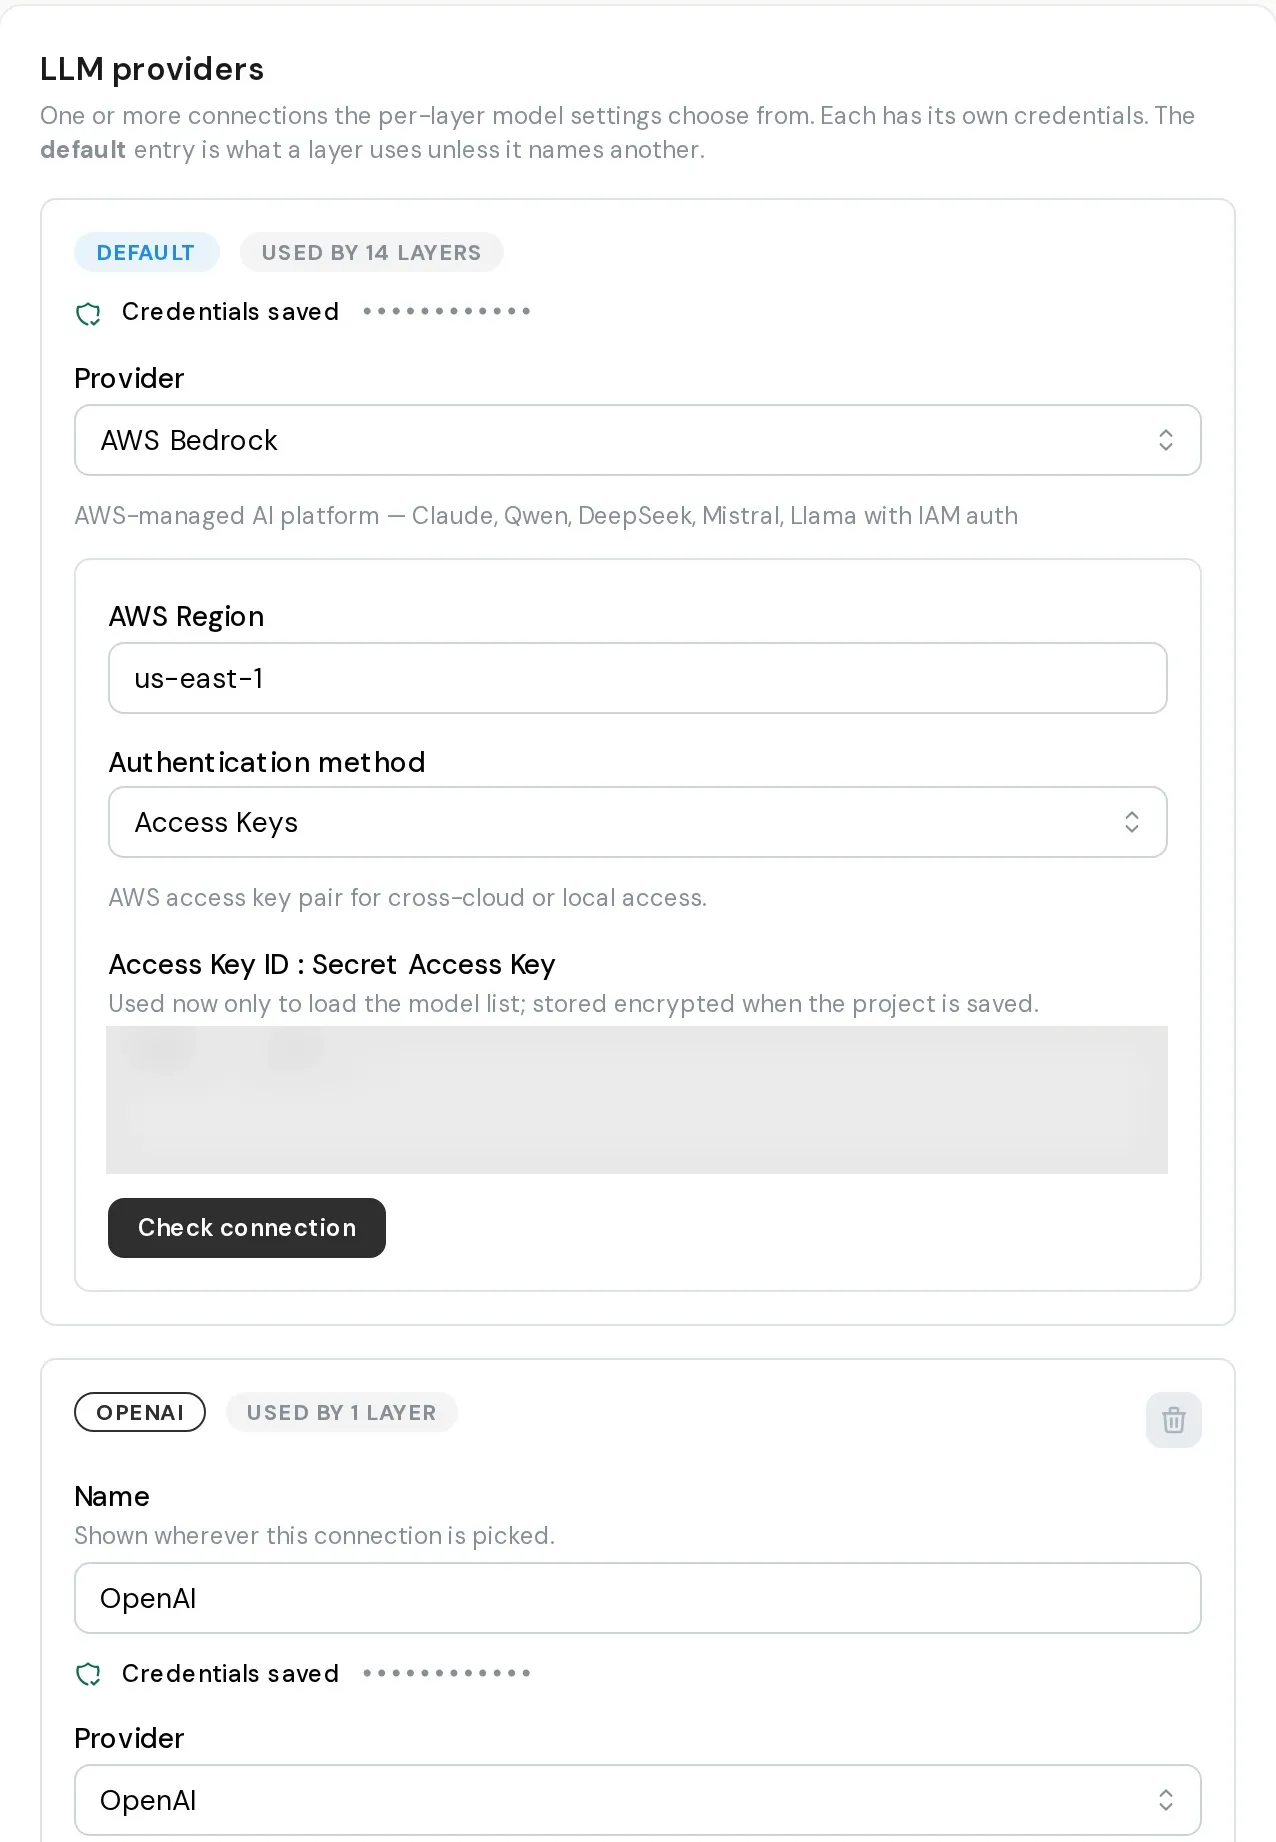
Under Settings → Models you choose the default model. It runs on the default connection, and every step inherits it. Then you give any step that should run on something else its own provider and model.
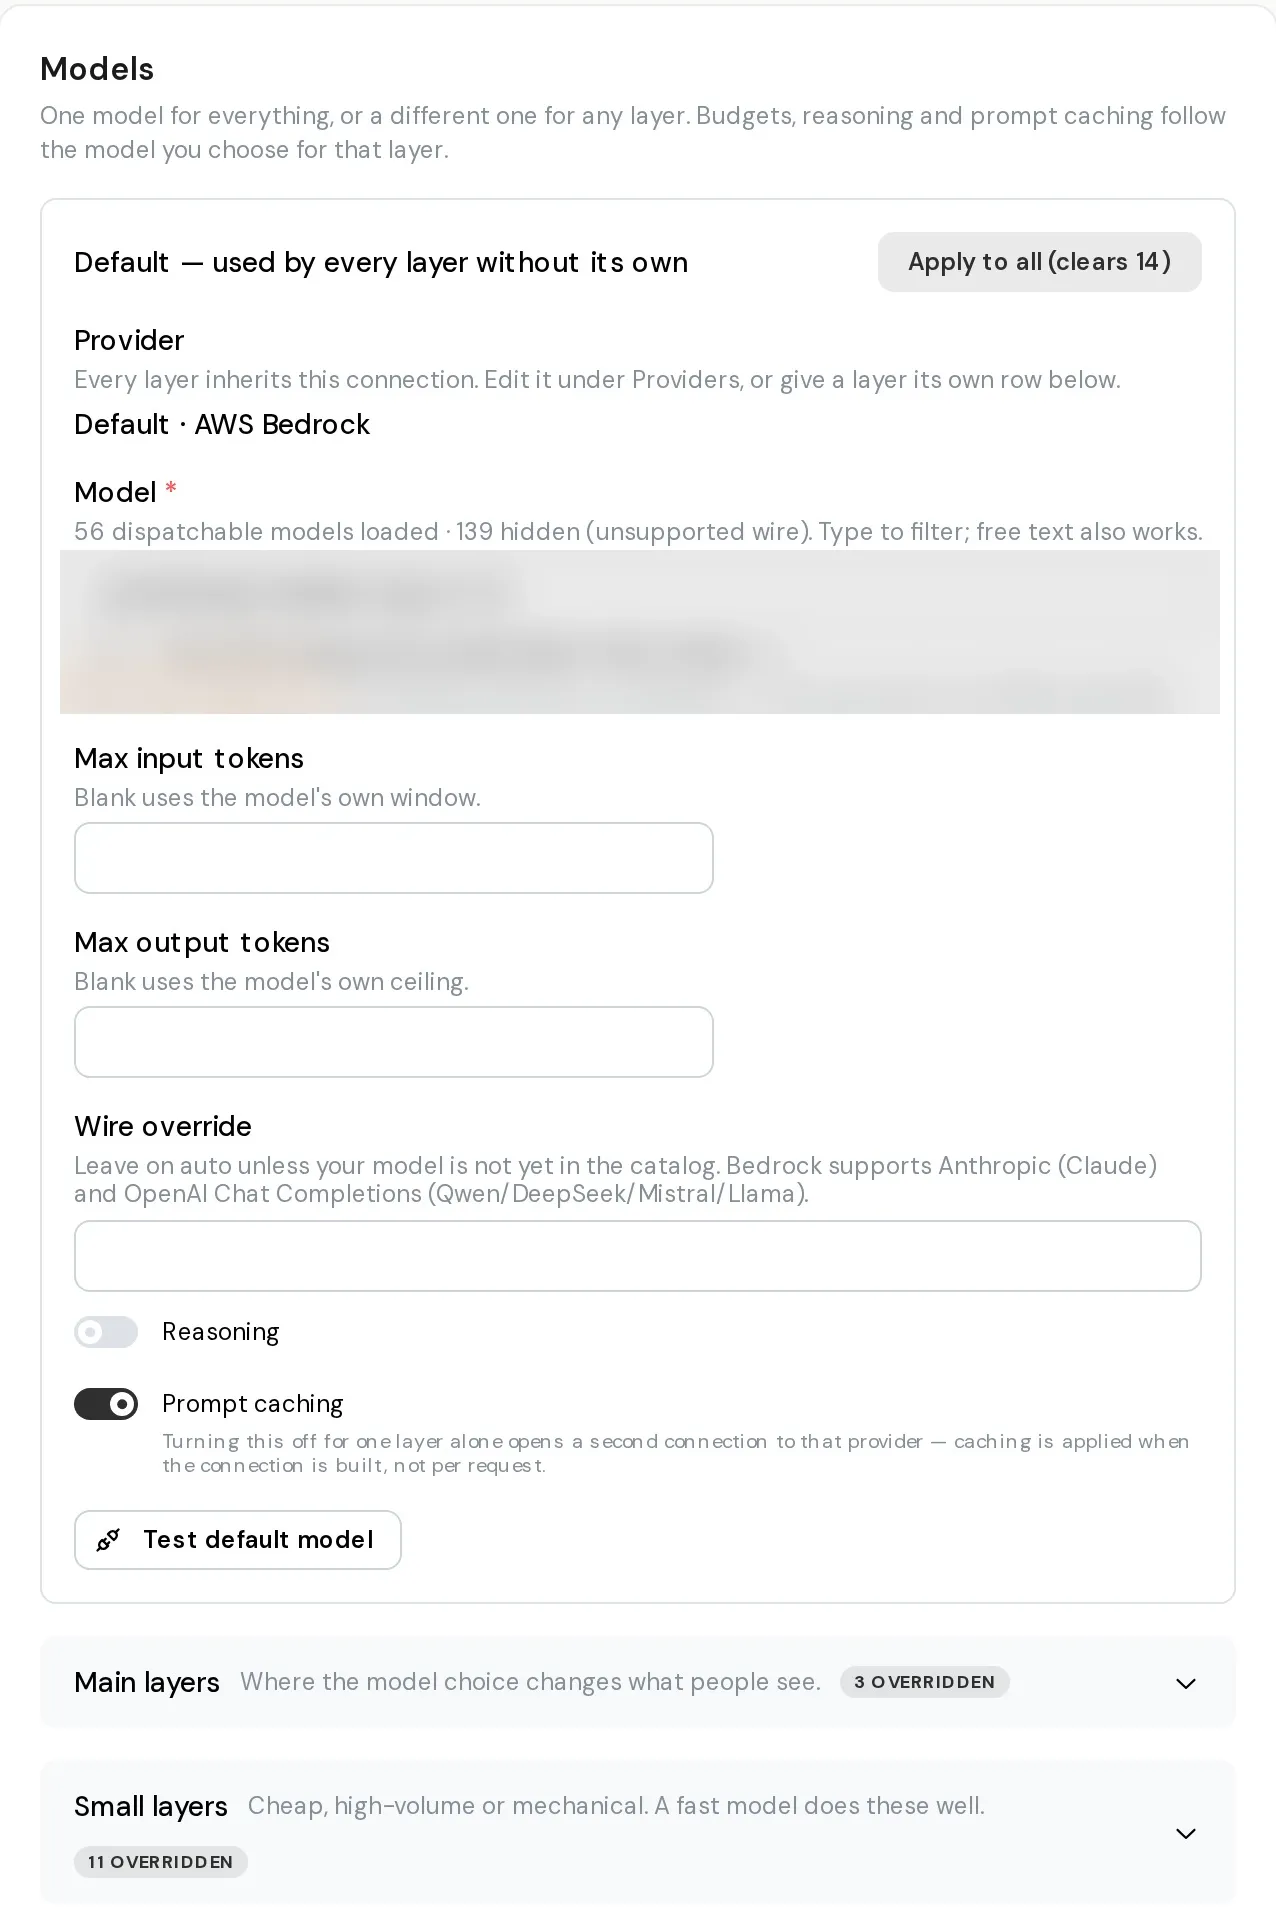
The docs call each step that calls a model a layer. There are 17 of them, in two groups:
| Group | Layers |
|---|---|
| Main: the model choice changes what people see | exploration, analysis, verifier, refuter, recommendations, Ask |
| Small: high-volume or mechanical work | clarifying questions, ledger reflection, SQL repair, Ask routing, Ask suggestions, table descriptions, knowledge-source summary, playbook generation, file ingestion, executive summary, report style |
The main layers produce what people read: the findings, the verdicts, the recommendations and the answers in Ask. The small layers do supporting work, such as repairing a failed SQL query or writing the summary of a knowledge source. The settings page describes them as "cheap, high-volume or mechanical".
The validation pair matters most. The verifier and the refuter are configured separately, and the docs say verdicts "depend heavily" on their model. Swapping that model changes what you see as verified. If you only change one thing, keep the strongest model you have on those two.
Settings follow the model
Each layer takes its input and output limits from its own model. Since v0.37.2, a layer on a small model is no longer asked for more output than that model can return, and a layer on a larger model is no longer held to a smaller model's ceiling. Reasoning effort is requested explicitly rather than left to the provider's default.
Reasoning and prompt caching are per layer too. In a mixed setup, one project-wide switch would apply to providers where it does nothing.
One layer has a rule of its own. The Table descriptions layer doesn't accept reasoning models, and the settings page says so before you save:
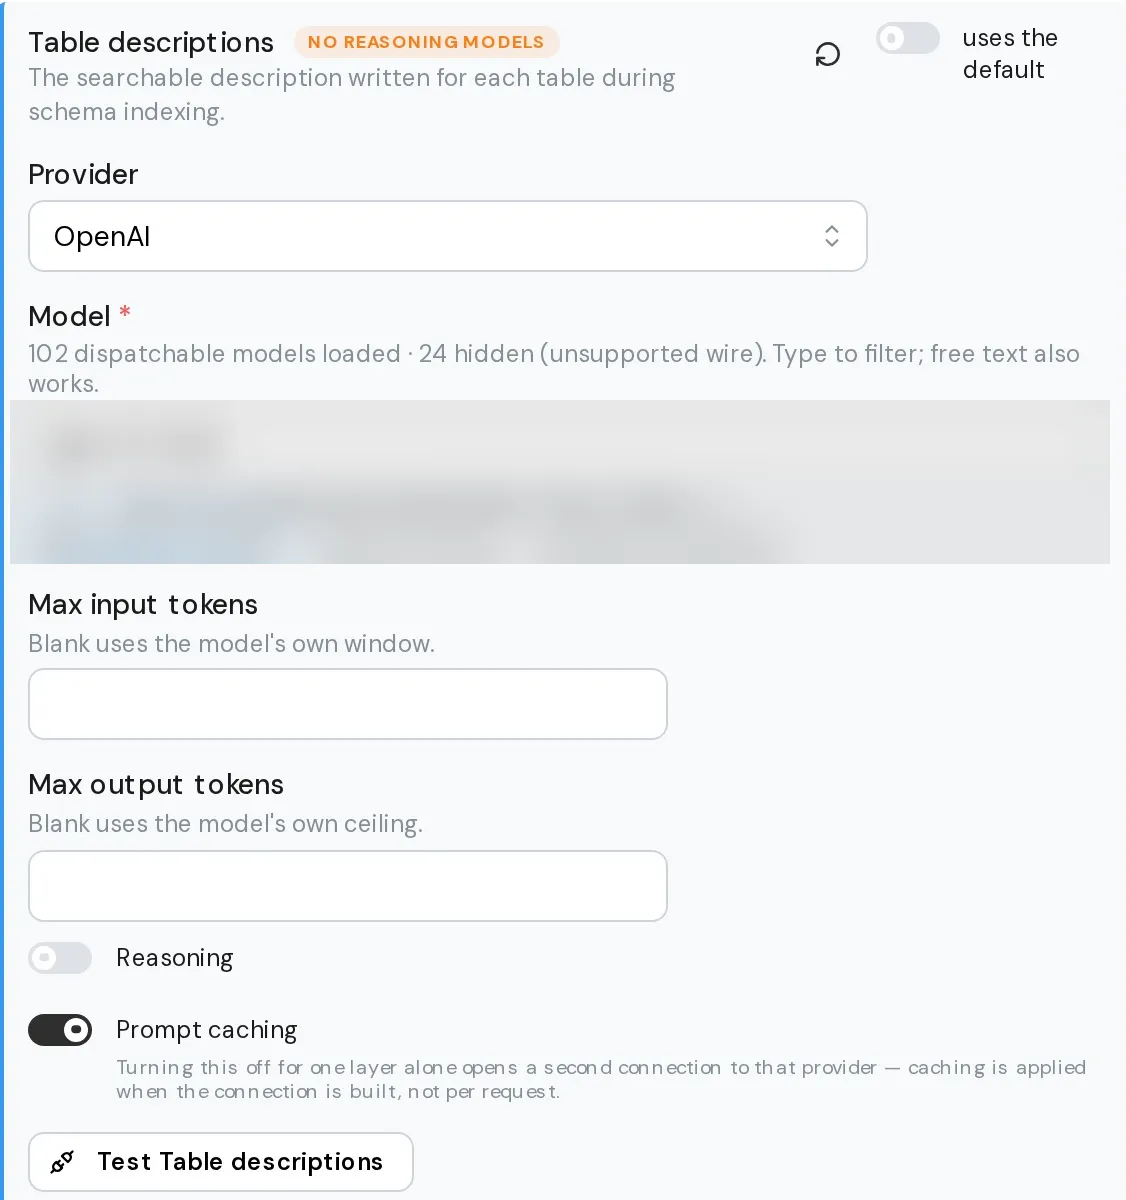
A model that thinks on every request returns an empty description inside that layer's small budget, and indexing makes one call per table.
What it saves
The configuration guide includes a measurement on a production ERP (enterprise resource planning) warehouse, with prompt caching on and the same judge scoring every run:
| Pipeline | Fully supported findings | Cost per run | Time per run |
|---|---|---|---|
| One high-end model everywhere | 40–52% (avg 46%) | $13.46 | 46 min |
| High-end model, cheap model on the small layers | 40.5% | $11.71 | 26 min |
| Open-weight model exploring, high-end model analyzing and validating, cheap model on the small layers | 38.5–61% (avg 49%) | ~$10.10 | 25–27 min |
In the docs' words: "A quarter off the cost and half the wall clock, with no loss in finding quality." The third row mixes providers as well as models, which is why a project can hold several connections.
How to read the comparison
Look at all three columns together. The middle row is cheaper and faster than the first, but its share of fully supported findings is lower. Moving only the small jobs to a cheap model saved money without helping quality. The third row kept a high-end model where it counts, on analysis and validation, and its average share of fully supported findings went up from 46% to 49%.
The ranges in this comparison are wide, and they overlap. To compare two setups on your own data, run each more than once.
Prompt caching comes first
The comparison above ran with prompt caching on. Caching arrived in v0.36.0. Exploration re-sends the whole conversation at every step, and caching lets the provider reuse that repeated text at a lower price. Measured with the same model, the same settings and on the same day, exploration cost fell by 95% and the whole run by 76%, with the same quality profile.
Caching is on by default for Claude models, whether you call them directly or through AWS Bedrock, Vertex AI or Azure AI Foundry. OpenAI-compatible providers cache repeated prefixes on their side, with nothing to set.
How to set it up
- Open your project's Settings → LLM Providers and add the connections you want. Each entry stores its own credential in the secret store, never in the project document.
- Open Settings → Models, pick the default model and click Test default model.
- Give the layers that should differ their own provider and model. A good start: a cheaper model on the small layers, and your strongest model on the verifier and refuter.
- Each layer has its own test button, such as Test Table descriptions. Run it for every layer you change, then save.
DecisionBox supports seven providers: Claude, OpenAI, Ollama, Vertex AI, AWS Bedrock, Azure AI Foundry and LiteLLM. That covers commercial APIs, cloud platforms, open-weight models such as Qwen or Llama through Bedrock, and local models through Ollama. The LLM provider guide has the setup for each one and the full rules per layer.
If you already have a project
A project created before v0.37 needs one visit to its settings. Discovery is refused until someone saves the model configuration, and a scheduled run on such a project fails, with the reason in its run history. The values arrive pre-filled from what the project already uses, so it is a quick review and save.
What it doesn't do
DecisionBox doesn't pick models for you. The model choices suggested here are a starting point, and the right mix depends on your warehouse, your budget and the providers you can use. The measurement in the table comes from one warehouse. Run your own project on two setups and compare the validation results before you settle on one.
See it in action
Episode 17 of our series shows the settings on the product's real screens:
"A different LLM for each analysis step" on YouTube
The bring your own model page lists every supported provider, and validation explains what the verifier and refuter check. Our post on how DecisionBox checks its findings against your data follows one finding through both checks, and how it works shows the whole run.